how to draw a fish
With the start of 2020 many people are thinking of new-years resolutions, some may even want to try their hand at the #SundayFishSketch but feel trepidation about their artistic abilities. Well, there is no time like the present begin a resolution to start drawing and the Fisheries Blog is here to help you begin the process. Continue reading for tips and tricks on how to draw your favorite aquatic animals, fishes! We will provide you step-by-step instructions, suggestions, and additional website tutorials to get you started down your drawing journey.
The Basics
One of the first things to keep in mind while sketching a fish is to pay attention to general body proportions, head size, mouth position, and fin placement. The position of the mouth (e.g., terminal, subterminal, inferior; green arrows in image below) and the location and number of medial and paired fins (purple arrows in image below) vary in morphology and number from species to species. These features play a huge role in species identification, and if you accidentally omit a fin in your descriptions or illustrations you could be misinforming your audience.
Additionally, I suggest any reader that wishes to attempt drawing more realistic fish take a brief look at a few fish skeletons. It isn't necessary to know the names of bones, but a general understanding of the underlying skeletal morphology of the fish species you are attempting to sketch will be helpful in many regards.

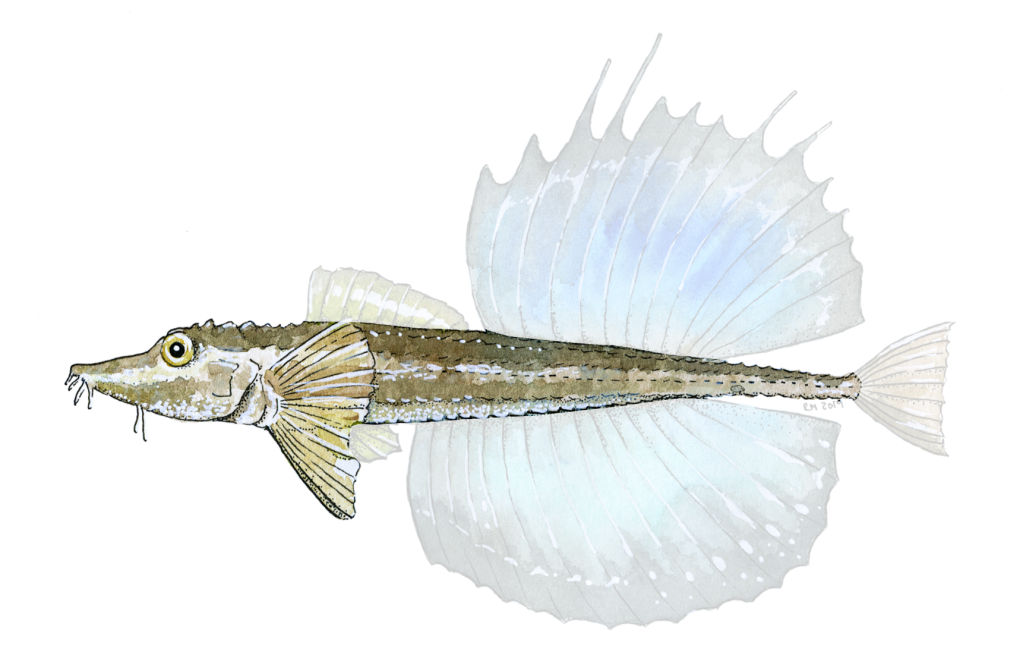
Artists should also pay attention to any constraints on body movement and bending in species that are heavily armored or have thick scales. Like the poacher in the image below, they are long but are covered in a bony armor and do not have the movement capability that an eel does.

Drawing a fish in a lateral position is a good place to begin understanding the necessary features to sketch on a fish. From there you can work your way into more difficult 'swimming' positions after you have become more comfortable with drawing body shapes and accurate fin placements.
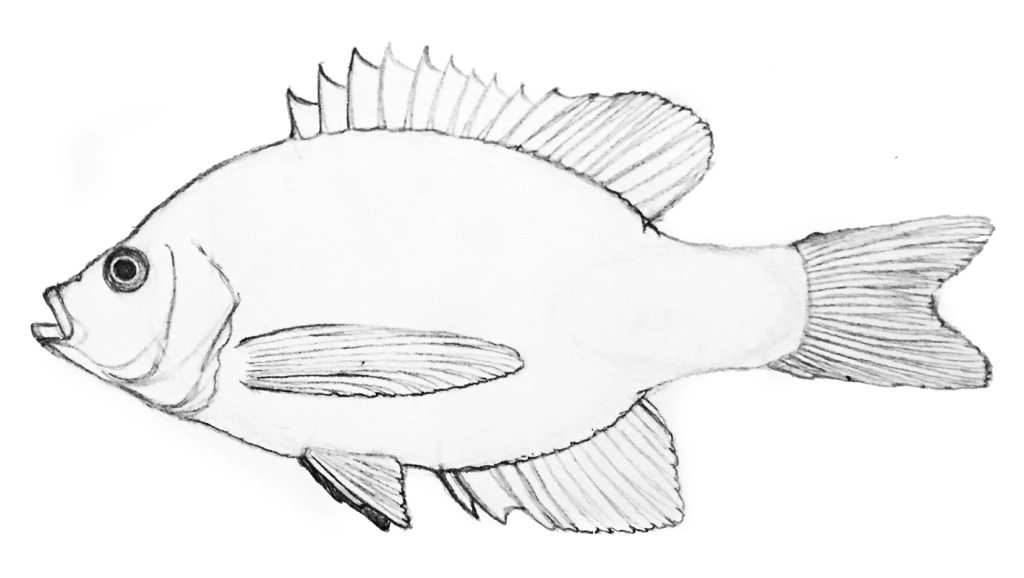
Now let's practice by drawing this bluegill sunfish.


Step 1: Take note of the general body proportions using basic shapes. Also notice the locations of the fins, where they begin and end. Begin by sketching the basic shapes that make up your species of choice and also mark where your fin insertions and eye should be in relation to the location of your basic shapes.

Step 2: Locate the rest of the body outline that wasn't captured by your basic shapes and add additional major features (see dotted lines). Rough sketch these features over your basic shapes to further flesh out your fish.

Step 3: Similar to the body, outline the fins with simple shapes. Make sure to pay attention to their size and location in relation to the rest of the body. You do not want to draw them too large or too small.

Step 4: If you are happy with your proportions, erase your basic shape lines leaving only the lines related to the features you wish to keep on your fish.
Congratulations you have sketched the basic shape of a fish! If you don't feel comfortable starting freehand with shapes, start by tracing over an image of a fish, this can help with muscle memory and understanding general proportions. Continue reading for additional tips and tutorials on fin rays and scales.
The Details
Once you feel comfortable enough with basic body shapes and fin placement you can start focusing more on details like fin rays and fin-ray counts, and scales and scale counts. These features can be very important for distinguishing between more closely related species. The following instructions do not need to be done in any particular order but include drawing tips and suggestions on attributes to pay attention to while you are sketching.
The Head

Focusing on the bluegill head we see minute details like the shape of the jaw, the cheek bones, and some detail in the eye. Many fishes have a lighter ring of color around the pupil and including this in your drawing will add realism to your fish. Also take note of the more detailed areas of the shape of the head, the head isn't a smooth straight line and may have dips and crevices. Adding these will add authenticity to your drawing.
The Fins
The location, shape, and anatomy of fish fins are very important. Cartilaginous fishes (e.g., sharks, skates, rays) have slightly different fin morphologies than those of bony fishes. Additionally, older bony fish lineages (e.g., gars and sturgeon) have soft fin-rays but may not have spiny fin rays.

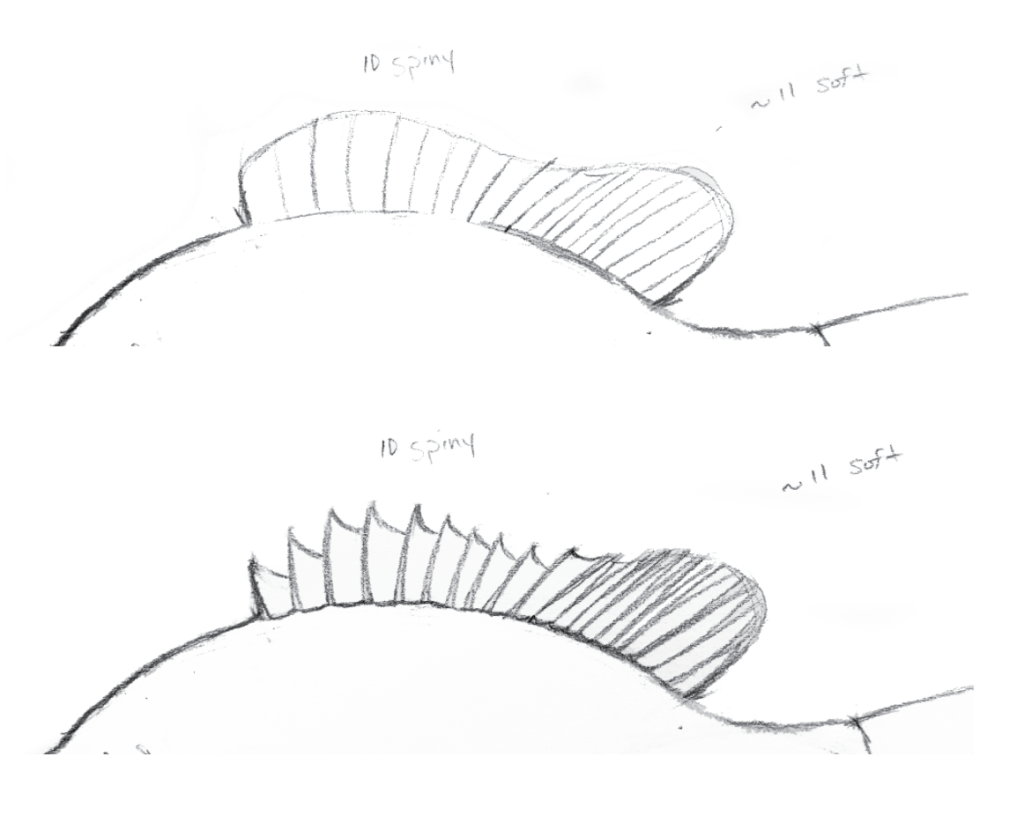
Looking at our bluegill, it has both spiny rays (solid purple lines) and soft rays (dotted purple lines). Spiny rays are usually larger and thicker than soft rays and are made up of a single spine. Soft rays usually bifurcate as they near the fin edge.

Take note of the number, location, and spacing of these rays on the dorsal fin and sketch them onto your fish. Add additional realism by adding bifurcations when sketching the soft fin rays. Also pay attention to the way the spines enter the body and the way the fin tissue is situated between the spines. Erase your initial fin outlines and any lines you don't wish to keep.

Repeat the steps above with the rest of the fins on your fish. Note the pelvic fin is actually a paired fin, and drawing in a second one behind and slightly offset of the first can add additional realism.
The Scales
Fish scales come in various types. Understanding both the overall shape and anatomical structure of the scales on the fish you are sketching is important for more detailed and scientific work. The size, number, and placement of scales (all over the body, some on the head and some not) can be important for species-specific identification. Also look closely for the lateral line on your fish, most fish only have one, but some may have two or three. It is a system of canals on fishes that contain organs that sense water movement. If the canal pores in the scales are visible, you may want to draw them on your fish.

Let's look at the sunfish. The dotted turquoise line is highlighting the lateral line and the circles depict approximately one row of scales. There are at least 36 scales from the head to the tail in the longest part of the body. Knowing this number will be important for adding scales to our fish drawing.

The yellow lines on the bluegill depict the pattern of scales from top to bottom, showing the slight angle at which you can follow scale rows. This is useful for understanding the method of drawing scales I will be using in this tutorial. Once you know the approximate number of scales in the longest row on your fish you can add similar guiding lines to your drawing to help with scale placement. Start by placing evenly spaced dots (in this case 36) on the longest part of your fish. Then sketch diagonal lines similar in angle to the rows on your fish. These lines are not perfect, as there is a general loss in the number of scales per row as you get nearer to the dorsal surface, and in some fishes, smaller scales on the stomach. That being said, the lines are good as a general guide.

Once you have your scale rows mapped out, fill in each diamond with a more detailed rounded scale working from the front of the body to the back. The anterior portion of most scales are embedded in the skin and overlapped by a more anterior scale and the posterior portion of most scales are free. You may want to take some creative license near the head and the stomach, as your scale row lines won't accurately reflect those areas.
Congratulations, you have sketched a fish, fins and all! Be proud of your accomplishment and the knowledge that similar steps can be used for all sorts of fish species. Continue reading for some final details and links to additional tutorials.
The Rest of the Fish
By now you're sick of drawing fin rays and scales. You can continue working on your fish by adding other details such as markings on the cheek area and shading. You can also trace over your drawing in ink and add additional colors using paint or colored pencils. I highly suggest emulating other people's artistic styles that you enjoy. Sometimes it is difficult to imagine a particular effect you would like until you have seen how other artists have done it.

The Resources
Below are some additional websites with tutorials on how to draw fishes. Each tutorial emphasizes slightly different things, so if this post did not work out for you, be sure to check out some of these others. There are also a multitude youtube tutorials on how to draw fish as well.
The Websites
- How to Draw a Fish by Eugenia Hauss
- How to Draw Animals: Fish and Sharks by Monika Zagrobelna
- How to Draw a Fish by wikiHow
If you tried out this tutorial and found it helpful, post a comment with a picture of your fish sketch. Happy New Year, good luck and happy drawing!
how to draw a fish
Source: https://thefisheriesblog.com/2020/01/06/how-to-draw-a-fish-fins-and-all/
Posted by: wernerfrivaloys.blogspot.com

0 Response to "how to draw a fish"
Post a Comment